Keep hands, hair, clothing, and handheld spatulas and other utensils away from beaters/whisks during operation to reduce the risk of injury to persons, and/or
8 pages
40 KB – 8 Pages
PAGE – 2 ============
IMPORTANT SAFEGUARDS SAVE THESE INSTRUCTIONS POLARIZED PLUGThis appliance has a polarized plug Ñ one blade is wider than the other. To reduce the risk of electric shock, this plug will fit into a polarized outlet only one way. If the plug does not fit fully into the outlet, reverse it. If it still does not fit, contact a qualified electrician. Do not attempt to defeat this safety feature by modifying the plug in any way. When using electrical appliances, basic safety precautions should alwaysbe followed, including the following: READ ALL INSTRUCTIONS. To protect against a risk of electric shock, do not immerse mixer, cord, plug, or base unit in water or other liquid. Close supervision is necessary when any appliance is used by or near children. Unplug from outlet when not in use, before putting on or taking off parts, and before cleaning. Avoid contacting moving parts. Keep hands, hair, clothing, and handheld spatulas and other utensils away from beaters/whisks during operation to reduce the risk of injury to persons, and/or damage to the mixer. Do not operate any appliance with a damaged cord or plug or after theappliance malfunctions or has been dropped or damaged in any manner. Return the appliance to the nearest authorized service center for examination, repair, or electrical or mechanical adjustment. The use of attachments not recommended or sold by the appliancemanufacturer may cause fire, electric shock, or injury. Do not use outdoors. Do not let cord hang over the edge of table or counter, or contact hot surfaces, including the stove. Remove beaters/whisks from mixer before washing. Do not use appliance for other than intended use. Do not operate in the presence of explosive and/or flammable fumes. This product is intended for household use only and not forcommercial or industrial use. Do not abuse the cord. Never carry the mixer by the cord or yank the cord to disconnect it from an outlet; instead, grasp the plug and pull to disconnect.2
PAGE – 4 ============
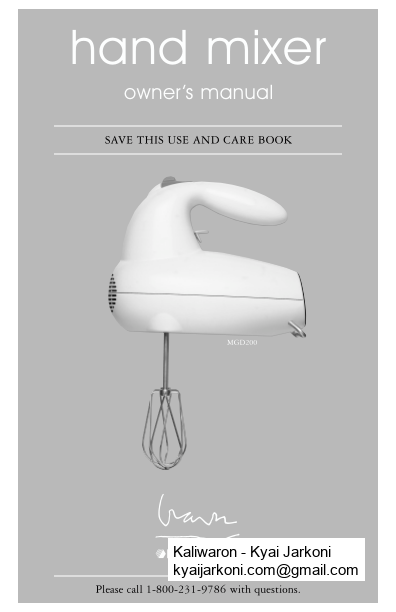
1. Be sure the Mixer is OFF (O) and unplugged before inserting or removing attachments. Since one Beater has a ÔcollarÓ on its stem while the other doesnÕt, each Beater fits only into one opening. Match the ÒcollaredÓ beater to the illustration on the Mixer to help you place it into the right hole (A). You may have to rotate it slightly until it locks into place. Beaters are not interchangeable.If a Beater doesnot lock in after rotating it, check the illustration on the Mixer and be sure you are placing the correct Beater into the appropriate opening. Do not force a Beater into a slot. The Whisks, however, are inter- changeable and either one can be inserted into either hole. 2. Plug the Cord into an outlet. 3. Place the ingredients into a bowl, grip the Mixer handle, and position the Beaters/Whisks in the center of the food to be mixed. 4. Select the appropriate speed setting for the task. See the ÒMixing GuideÓ on page 5. 5. Guide the Beaters/Whisks continuously through the mixture for uniform mix- ing. Whenever you wish to scrape the sides or bottom of the bowl using a hand- held utensil, be sure to turn the Speed Control Switch OFF (O). Place the Mixer on the Heel Rest so that batter can drain into the bowl (B).6. Turn the Mixer off and unplug when finished. To remove the Beaters/Whisks, position the Mixer over a bowl or sink and pull the Beater Eject Lever up.POWER BOOST1. The Power Boost lets you increase the mixing speed to the maximum power level from any setting. When you feel the Mixer slowing down or straining in tough mixing tasks (such as mixing cookie dough), press the Power Boost Button. 2. As soon as you release the Power Boost Button, the Mixer will return to your pre-selected speed.HOWTOUSE 4AB
PAGE – 5 ============
MIXING GUIDE5MIXING GUIDEUse the following guide for speed selections. NOTE:Start mixing at the lowestspeed and gradually increase as needed. SPEEDFUNCTIONUSE 1 (Low)BlendTo blend flour/dry ingredients and liquids for batters and cookie doughs. To blend nuts, chips, raisins into cookie doughs. 2 (Low)StirTo prepare sauces, puddings, muffins, and quick breads. To stir thin batters. 3 (Medium) MixTo prepare batters and cake mixes. To cream butter and sugar or mix eggs into batters.4 (Medium)BeatTo beat whole eggs, frozen desserts, frostings. To mix light batters like popovers. 5 (High)WhipTo whip fluffy mixtures, whipped cream, egg whites, and mashed potatoes. Power BoostUse at any speed setting to get maximum power for tough mixing tasks.CARE AND CLEANINGNo other maintenance is required other than the care mentioned here. Repairs, if necessary, must be performed by a Black & Decker Company-Owned or Authorized Household Appliance Service Center. For the Service Center nearest you, call the toll-free number on the cover of this manual. 1. Be sure the Speed Control Switch is in the OFF (O) position and the cord is unplugged before cleaning any part of the Mixer. Eject the Beaters/Whisks. 2. The Beaters and Whisks may be washed in hot, sudsy water or in a dishwasher. Dry all parts thoroughly before storing. 3. Clean the Mixer or cord with a damp cloth. Do not immerse the Mixer in water. To remove stubborn spots, wipe surfaces with a cloth dampened in sudsy water or a mild, non-abrasive cleaner. Follow with a clean, damp cloth. Do not use abrasive cleaners on any part of the Mixer as they can damage the finish.STORING THE MIXER1. For longer life, avoid jerking the Power Cord or straining it at the plug connection. To store, coil the Cord in loops and secure it with the attached cord tie. Do not wrap the cord around the Mixer. 2. Store the Beater and Whisks in a drawer or in the original packaging. MIXING TIPS 1. For best results when beating egg whites, do not use an aluminum or plastic bowl. Use a stainless steel, copper, or glass bowl. 2. For best results when whipping cream, chill the cream, Beaters, and bowl. Start with setting #1 and gradually increase to WHIP (#5) as the cream thickens.
PAGE – 6 ============
6RECIPESLEMON POPPY SEED MUFFIN TOPS3/4cup sugar1-1/2teaspoons grated lemon peel 1/2cup butter or margarine, softened2cups all-purpose flour 2eggs1/4cup poppy seeds 1container (8 oz.) lemon-flavored 1/2teaspoon baking soda yogurt (regular or low-fat)1/4teaspoon salt 2tablespoons lemon juice 1. Preheat oven to 350ûF. With beaters in place, cream butter and sugar together in large mixing bowl at low speed for 15 seconds, then medium speed for 30 seconds. 2. Add eggs, yogurt, lemon juice and peel; blend at low speed for 30 seconds, then at medium speed for 30 seconds, occasionally scraping sides and bottom of the bowl. 3. In a separate small bowl, combine flour, poppy seeds, baking soda and salt. Add to creamed mixture and blend at low speed just until mixed, occasionally scraping sides and bottom of the bowl. 4. Drop by heaping tablespoonfuls onto lightly greased cookie sheets. Place about 2 inches apart to allow for spreading. 5. Bake for 15-17 minutes, or until lightly browned. Remove from cookie sheets immediately and cool on wire rack. Makes: 22-24 (3-inch) muffin topsSNOWBALLS2cups sugar4cups all-purpose flour 1cup butter or margarine, softened2tablespoons baking powder 1container (15 ounces) ricotta cheese3/4teaspoon salt 2eggs Shredded coconut for garnish 2teaspoons vanilla 1. Preheat oven to 350ûF. In large mixing bowl, combine sugar and butter. With beaters in place, mix thoroughly at medium speed. Increase mixer speed to high and beat mixture until light and fluffy, about 5 minutes. At medium speed, beat in ricotta cheese, eggs and vanilla until well blended. 2. In separate bowl, stir together flour, baking powder and salt. Add gradually to sugar mixture on low speed. 3. With floured hands, roll about 1 tablespoon dough into ball. Dip ball into shredded coconut. Place balls 2 inches apart on ungreased cookie sheet. Bake about 15 minutes, or until cookies are light brown and coconut just starts to brown. (Cookies will be soft.) 4. With spatula, remove cookies to wire rack to cool. Makes: About 6 dozen cookies. FRESH APPLE BUNDT CAKE3apples, pared, cored and thinly sliced1cup butter or margarine, melted 1tablespoon cinnamon1teaspoon vanilla 1-3/4cups sugar, divided2-1/2cups all-purpose flour 4eggs3teaspoons baking powder 1. Preheat oven to 350ûF. Gently stir together apples, cinnamon, and 1/4 cup sugar in a bowl. 2. With beaters in place, beat eggs in large mixing bowl at medium speed until frothy, about 30 seconds, then at high speed for 30 seconds. Add 1-1/2 cups sugar gradually, beating at high speed about 1-1/2 minutes, until thick and fluffy. 3. Add butter in a thin stream, beating constantly at medium speed for about 1 minute, until well blended. Add vanilla; blend in at low speed for 10 seconds.
PAGE – 8 ============
The highly acclaimed work of Michael Graves has restored a sense ofhumanity to modern architecture, which in turn makes him one of the most recognized architects of our time. Together with Disneyª, he designed their corporate headquarters and the Walt Disneyª World Swan and Dolphin Hotels. Notable for his ability to craft inventive items for the home, Michael has designed products for companies such as Alessi, F.A.O. Schwartz and Steuben. In light of his vast body of work, Michael Graves has, and continues to, define the aesthetic of the 1980Õs and 90Õs. The Michael Graves product line is an inspired balance of form andfunction. At once it is sensible and sublime, practical and whimsical, utilitarian and aesthetically pleasing. Michael Graves creates useful objects, which not only carry their weight, but simultaneously lift our spirits. Michael Graves hand mixer
40 KB – 8 Pages